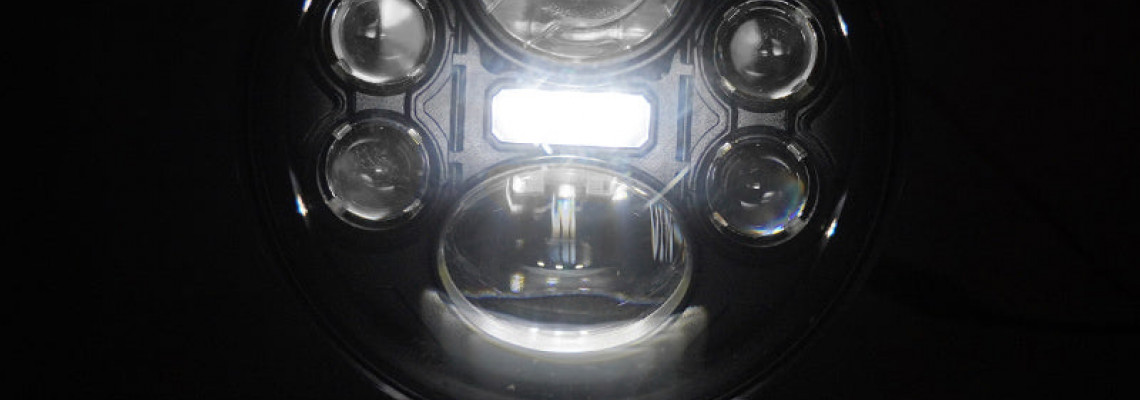
5x7 LED Headlights Holley X Morimoto for Classic Cars

5x7 LED Headlights Holley X Morimoto for Classic Cars
A wide variety of 5x7 headlamp alternatives are available for your vintage vehicle. Sadly, most have one or more significant drawbacks. Poor build quality, fit, light performance, or unsightly styling could be the cause, with the exception of one. Holley's new Retro Bright LED Headlight is the result of their collaboration with Morimoto.
Holley has developed a revolutionary LED headlamp for the sealed beam market. Constructed in a small, dependable, and historically accurate manner, these Retro Bright Headlights are customized for your vintage car. They also come in a variety of sizes, so you're sure to find one that fits your vintage vehicle.
PERIOD CORRECT
These brand-new LED headlights are designed to be easily installed in your vintage car and come in a small box. Compared to their halogen counterparts from the past, modern headlights that have the exact dimensions of a vintage car, like these 7-inch round headlights, are frequently significantly larger. Many bells and whistles are included in new LED headlights, or even halogen ones, to perform a range of tasks that invariably increase the housing's mass.
They have taken the output and power of those ostentatious modern headlights and traditionally used them with Holley's latest offering.
After that, things improve. The Retro Bright headlights are available in two different colors and have the same appearance and fit as the original equipment lights they are intended to replace. The first is the traditional white headlight with its 3000K color temperature. If you want to go all out for that period-appropriate look, this is for you. In addition, the 5700K modern-white color offers a higher light output than the 3000K lamps.
These 25-watt LED headlights are compatible with any car that has a 9–18-volt power source. Finally, they comply with SAE.
Additionally, we would like to mention that these are available in 4x6', 5.75" round, and 7" round housings.
OUTPUT
In relation to its packing, Holley and Morimoto have produced a monstrous spotlight while we're talking about output. On a low beam, the 3000K light delivers a maximum of 1280 Lux. The brightness of this is 141% higher than stock. The beam pattern is the most significant enhancement. The beam design of the stock light hardly provides you with any width.
The 3000K Holley Retro Bright LED headlight emits a maximum of 1580 lumens when the high beams are turned on. The coverage is fantastic despite the fact that it is only 43% brighter than the stock 1100 max. Lux. Leagues are more visible in both width and distance.
Performance-wise, the 5700K Retro Bright headlights outperform the 3000K model. With a maximum brightness of 1460 Lux, the 5700K LED bulb is 175 percent brighter than the standard one. The stock halogen headlight emits 1100 max. Lux, but this LED bulb emits 1890 max. Lux when on high beams. The disparity is 71%.
Additionally, you don't have to be concerned with beam pattern variances because, aside from the apparent color temperature difference, they are identical. Changing these bulbs is similarly straightforward. The two Allen screws on the back of the housing only need to be undone. You can then take out the lightbulb.
INSTALL
These are incredibly simple to install, unlike many components of vintage autos. Usually, a few external screws are needed to remove a piece of bodywork that holds the headlight and its retainer ring in place.
After removing the body panel, unscrew the retention ring that secures the Holley LED headlamp. The only thing holding the headlight in place is the retainer, so be sure you have your hand on the actual headlight.
Remove the housing from the wire after removing the headlamp from the retaining ring.
The Holley Retro Bright LED headlights and the factory housing differ significantly in this regard. The Retro Bright features a sturdy wire that extends from the bulb, in contrast to the OEM housing, where the connectors are integrated into the bulb. Don't worry, the next few stages are simple, and the connectors remain the same.
You can install your light in one of two methods, depending on your car.
If your car has two headlights, one on each side, you need to plug the light into the vehicle's harness. If necessary, you can then replace the bodywork and retainer ring.
If your car has quad headlights, two on each side, you may utilize the adaptor. By plugging both headlights into the adaptor, you can have four low beams and four high beams rather than two low beams and two high beams.
After deciding on a route, you may encounter malfunctioning lights. Do not be alarmed! This probably indicates that the wiring in your classic is reverse polarity. Plug the extra adaptor harness into the housing or relay to get your Retro Bright headlights to function. Then, connect the three terminals to the kit's factory connector.